Monday 28 May 2007

Seoulfood

I got my first taste of Korean food in Japan - at Seoul BBQ near my old apartment - and since then I've been hungry for more. After visiting some great local Korean restaurants, experimenting with kimchi at home and browsing My Korean Kitchen when I should have been working, the next logical step was a trip to Korea, right?

I mean, it would have been a shame to have lived in Japan without visiting its closest neighbour. Seoul is less than 2 hours from Tokyo by plane - much closer than the northern Japanese islands. While my students took their midterm exams I booked a ticket, bought a guidebook and spent four days checking out the sights, sounds and tastes of Seoul.

This is what I ate...

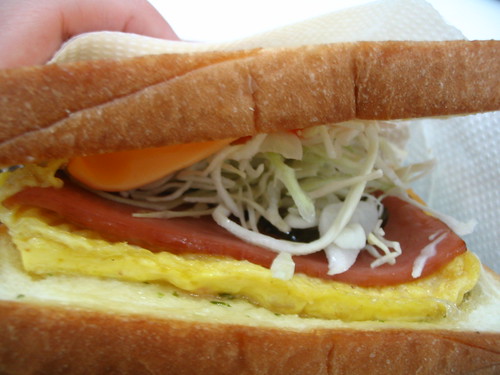
My first meal off the plane was at Isaac Toast - a popular breakfast chain. The toasted sandwich with corn and egg omlette, ham, cabbage and pickles was pretty good, if a little greasy.

Isaac Toast for breakfast - delicious


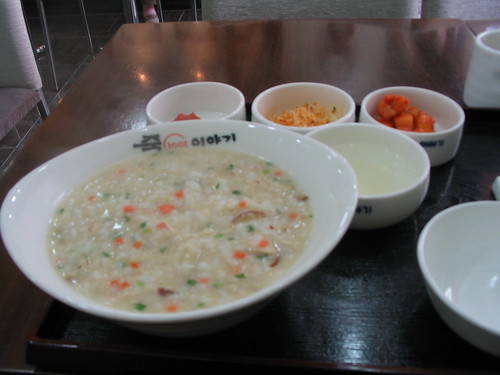
Chicken and ginseng rice porridge (juk).
Juk - chicken and ginseng rice porridge


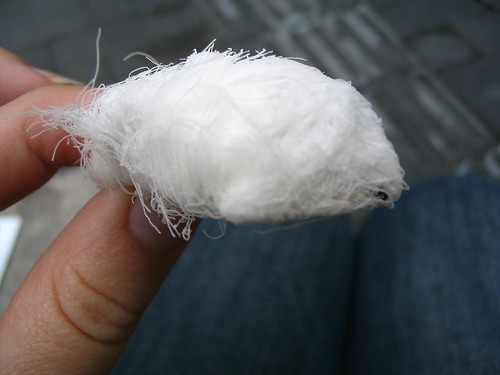
Kkultarae candies - sugary threads spun around a honey nut mixture.
IMG_1404.JPG


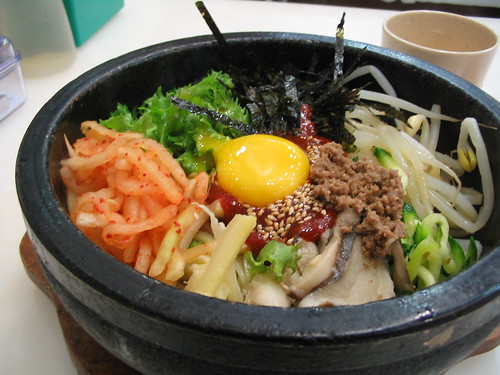
Bibimbap - Rice, veggies, beef and a spicy paste arranged in a hot stone bowl to be mixed and cooked through at the table.
Bibimbap.


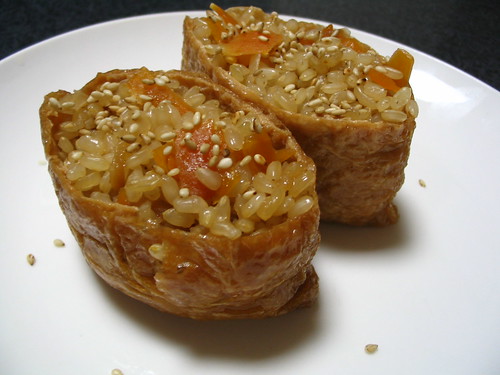
Korean sushi (Gimbap/Kimbap) comes pre cut! I love it! Unlike sushi, the rice isn't seasoned with vinegar and they don't usually use raw fillings.
Gimbap


Tteokbokki - rice cakes in a sweet spicy sauce. I enjoyed these on my first night at a street still in Dongdaemun Market, accompanied by a can of 'Cass' beer. One of the best things I ate in Korea.
Tteokbokki


Odeng (the Korean version of Oden?) was served with my tteobokki. The broth tasted very clean and light, with none of the fishiness of Japanese oden.
Odeng


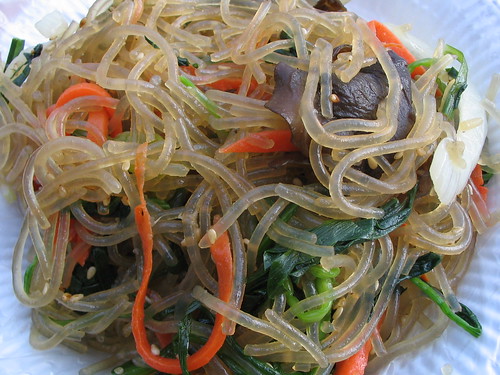
Japchae - glass noodles and veggies in a light sesame soy sauce. After the spice overload they were really refreshing.
Japchae


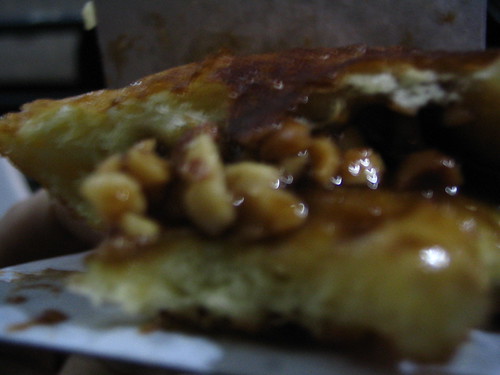
Hotteok - a donut like package filled with nuts, honey and cinnamon. It was quite different from the one I ate in Koreatown.
Hotteok


I bought these sweet, sticky rice crackers coated with sesame seeds from an old woman with a little stand outside the station, who good naturedly put up with my absolute lack of Korean. They were so good - just the thing to nibble on with a cup of green tea.
Station Snacks


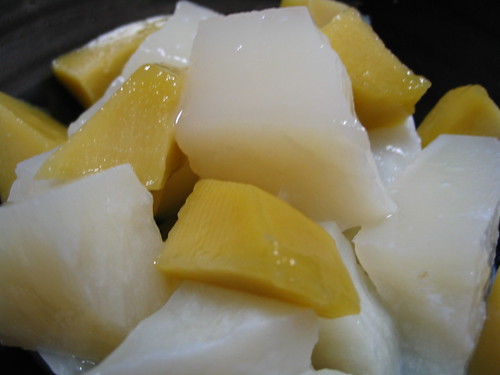
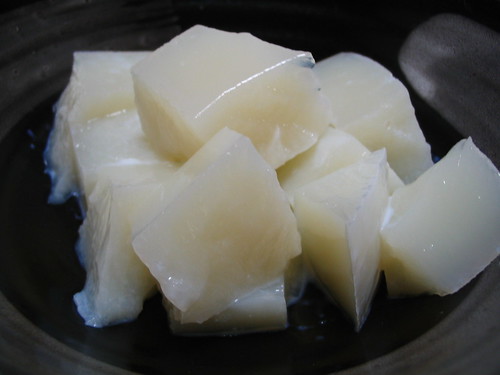
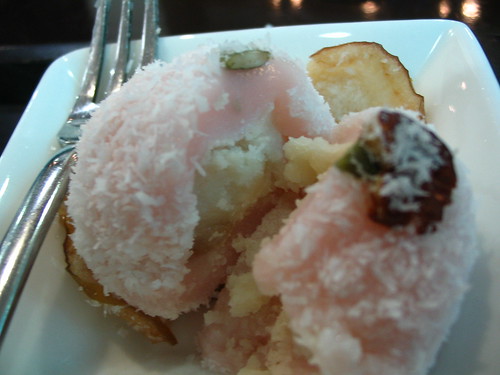
An apple blossom flavored tteok (rice cake) from Jilsiru Tteok Cafe, below the Tteok Museum. It was much more delicate than any mochi I've tried, filled with a slightly sweet paste and coated in coconut. Don't you think it looks a bit like coconut ice?
Apple Blossom tteok


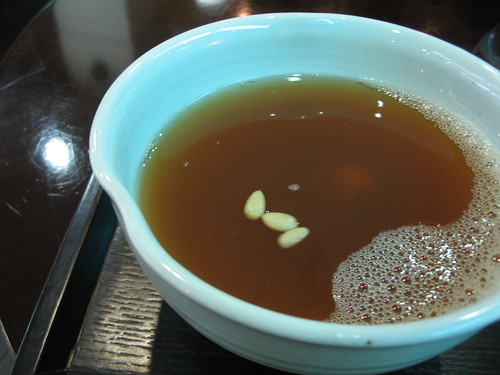
Sujong-gwa - a sweet spiced ginger punch with dried persimmon served ice cold and garnished with pine nuts. The first few sips were heavenly but it was a little on the sweet side after that.
IMG_1532.JPG


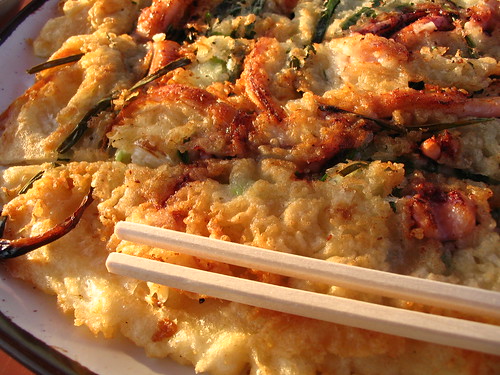
A huge circle of crispy pan fried batter filled with octopus and nira (garlic chives) and served with a tangy slightly spicy soy dipping sauce. In Japan these Korean-style okonomiyaki are known as chijimi but I didn't manage to catch their Korean name. The English menu reffered to them as Korean Pizza, which they don't resemble in the slightest. *sigh* Sometimes I hate the English menu.
Chijimi


Galbitang - beef rib soup. The broth was incredibly meaty and savoury, but there wasn't a lot of meat happening on those bones. A generous heap of glass noodles and lots of veggies almost made up for that though.
Galbitang


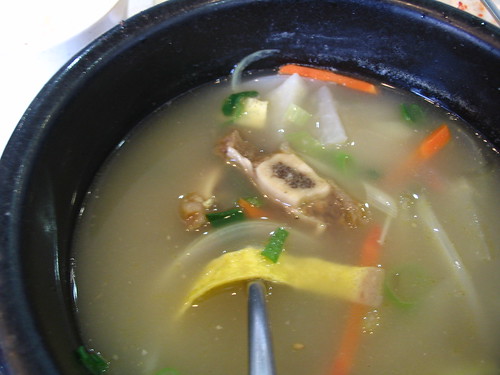
The side dishes that same with my soup. With 2 kinds of kimchi, little fish cakes and the complimentary rice, I nearly didn't need my main dish.
Whoa sides!


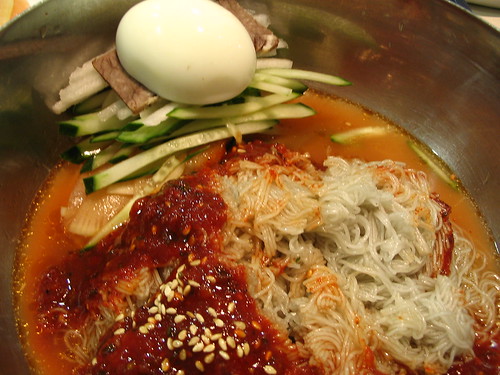
Bibim Naengmyon - noodles in a cold, spicy broth. These look so delicious, but like all food sold at the airport they were pretty nasty. I should have stuck with ice cream.
Bibim Naengmyon


One of the downsides of traveling alone is a lack of dining companions. I would have liked to splurge on an upscale restaurant one night or have a blow out yakiniku meal but my guidebook was pretty discouraging about dining solo. Not to mention cooking your meat by yourself feels a little too much like work. Ah well, next time.

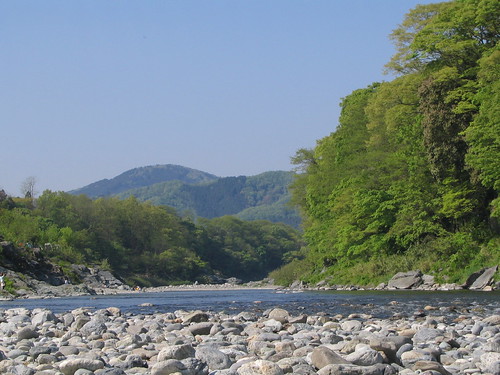
Seoul was an incredibly friendly city and there was so much to do that I never found time for. Aside from the usual palaces and museums I was lucky enough to be there for the Lotus Lantern Festival in honor of Buddha's birthday, which was amazingly beautiful. I also visited a few foodie tourist attractions and took a cooking class where I made kimchi and a kind of bulgogi - pictures and recipes to come.

Todaima.

I'm back from my hastily planned jaunt to Korea and working on some posts about what I ate there as well as things from my kitchen that are long overdue.

It's been a fantastic few weeks, but all I can say is that I need to take a break from kimchi for a while!

Monday 14 May 2007

Milky Kanten Jelly - 牛乳かん

IMG_1376.JPG


Last year I took a few Home Economics classes with my students. I was partnered with some very genki third year boys who got a kick out of trying to mime the Japanese instructions and the whole thing was a lot of fun.

One of the first things we made was a milk jelly using kanten. Kanten, also known as agar-agar, is a seaweed extract that works like gelatin, is vegetarian-safe and full of fibre. Here in Japan there's been a lot of talk about its health and weightloss benefits and it's a common ingredient in desserts like yokan and anmitsu.

Kanten is also used to make a milky jelly called annindofu, which is flavored with almond extract and usually served cut into squares and mixed with canned fruit. It has a mild, creamy taste and the first time I tried some I assumed it was a kind of sweet tofu.

I wanted to try making something similar, but of course by now I'd misplaced the recipe from Home Ec and I had to make do with guestimations from the internet. The first batch wasn't great. I don't think I used enough liquid, and didn't disolve the kanten properly, because while everything set and the taste was fine, the jelly had a weird grainy texture. For my second attempt I did what I should have done from the beginning and followed the Japanese directions on the box, with a little tweaking to give it a vanilla flavor. This is the method I used....

IMG_1371.JPG


Recipe: Milky Kanten Jelly - バニラ 牛乳かん
Serves 4 with fruit as a light dessert.

250ml water
250ml milk (low fat will work fine)
4g packet of kanten powder
40g sugar
dash of vanilla essence


  • Mix the water and kanten powder in a small saucepan and bring to the boil.
  • Reduce heat to a simmer, whisking until the kanten has been completely disolved.
  • If you're unsure whether kanten in sufficiently dissolved, rub a little of the liquid between your fingers. If it feels lumpy or grainy, it needs more time.
  • Add sugar, milk and vanilla, continue whisking until sugar is absorbed and it starts to bubble lightly.
  • Remove from heat and pour into your mould of choice.
  • Refridgerate for several hours until set firm.

This time the texture was as firm and smooth as Aeroplane jelly and thanks to the vanilla it smelt amazing. With this much sugar the jelly was delicious all by itself, but I'd use less if I made it to serve with canned fruit again. Jelly is such a great summer dessert - light, cool and perfect with all the fresh fruits that are appearing in the shops now.

I'm almost glad my first batch didn't work out, because while I was searching for answers I found my new favorite blog - Naoko-san is a Japanese expat living in California and she's got a really cute writing style, interesting Japanese-fusion cooking and a wealth of georgous kanten desserts like kuro goma and ricotta kanten, matcha milk kanten and marscapone kanten. I'm looking forward to trying out a few of her recipes as well as experimenting with coconut milk and tropical fruit combinations, or a jelly version of coconut bubble tea. Yum! I don't think I've been this excited about jelly since I was 5 years old.

Friday 11 May 2007

Tea Eggs

I'd wanted to try these tea eggs (cha ye dan in Chinese) in Taiwan, but there was so much delicious food crying to be eaten that I never quite got around to it...

Eggs in soy? tea? Wulai


Last week B and I were at the Showa Kite Festival when we happened across a stall with Obasans selling local specialties. There were those tea eggs again! Alas, we'd already eaten lunch, so we contented ourselves with buying some locally grown shitake to make dinner with and sampling a few crispy fried senbei.

The mushrooms made a lovely risotto, but the next day the tea eggs were still on my mind. Did they taste like tea? It eventually occurred to me that they probably wouldn't be difficult to make at home.

They weren't, and as one blog comment put it "to the person who is afraid she would screw up tea eggs, there is no way. If they don't taste like you want them to, eat those and try again."

The method below seems to be the general consensus on basic tea eggs, but pepper, salt, orange peel, ginger, garlic, dry sherry and black sesame seeds have all come up in personal recipes, so feel free to experiment with what you have lying around.

Simmering tea eggs.


Recipe: Tea Soaked Eggs

6-12 eggs
4 star anise
1 cinnamon stick
1/4 cup soy sauce
5 black tea bags or equivalent loose tea

  • Place eggs in the bottom of a pot and cover with cold water. Bring the water to the boil, cover and remove from heat.
  • Wait 10 minutes or so, then using spoon removed eggs from pot and plunge into cold water.
  • When eggs are cool enough to touch, gently tap with a spoon until small cracks form.
  • Place eggs back into pot, add remaining ingredients and bring to a boil.
  • Reduce heat and simmer for a few hours. This will make your house smell amazing.
  • Eat desired quantity of eggs, refrigerate any leftovers still immersed in the simmering liquid.
(If you are in a rush, you can remove the eggs earlier but longer time will give a more intense flavor.)

Tea Eggs


The flavor was a lot milder than the wonderful fragrance wafting from the pot, but it was definitely a new and delicious twist on the standard hard boiled egg. Next time I might use a little more soy, ginger, or oolong tea, which apparently gives a nice smokey undertone.

If you want something a little less subtle, try mixing some of the simmering liquid with a little soy and sesame oil and using it as a dipping sauce for the egg. I ate a few that way and the tea and spice flavor really came through, but they were also good with just a dash of salt and pepper.

I think the spiderweb patterns the cracks make on the eggs are beautiful (though not too good to eat!), and next Easter I'm going to try dying a few eggs the same way.

Tea Egg

Thursday 10 May 2007

Inari Sushi - 稲荷ずし

Inari-sushi


Do you ever have a kitchen inferiority complex? A technique or recipe that sounds so complicated or delicate you are forever putting off facing it, 'until I'm a better cook/more experienced/have more room/buy more expensive equipment/have an expert to hold my hand'?

A lot of people are in awe of the souffle, gelatin, or making creamy sauces. For me, it's always been baking with yeast. I know, people do it all the time, but somehow I fear the yeast will sense my nervous touch and refuse to rise. I don't mind eating my mistakes, but what do you do with a lump of flour?

Recently I've discovered my Japanese food fear - sushi rice. Something about the Japanese reverence for the skills of sushi chefs, the specialised equipment recommended and the heated internet discussions about the correct amount of vinegar has convinced me that the task of cooking some rice in a rice cooker and seasoning it with vinegar, salt and sugar is beyond me. Generally I believe in learning through making mistakes, and I've happily jumped in and butchered plenty of other Japanese dishes, but we're all a little illogical sometimes.

So for now I am gently skirting the issue, making faux sushi in all its varieties, reading up on the subject and, of course, sampling a lot of restaurant sushi to get a "feel" for it. The feel is very important.

This week's confidence booster was inari sushi pouches stuffed with a takikomi gohan mixture instead of the usual sushi rice. Inari sushi, pronounced inarizushi in Japanese, is named after the Shinto god of rice and is a homey sushi variation more comfortable in a bento box than a fine restaurant.

Most often filled with plain white sushi rice, I also see a lot of rice mixed with sesame seeds, furikake, seaweed or some thinly sliced vegetables. You could use whatever you like, but the rice should be the dominant taste.

Recipe: Inari Sushi with Carrot, Enoki and Kiriboshi Daikon
Makes 12 fully stuffed pouches.

1.5 cups of brown rice
2.5 cups of water
1 piece dried konbu
3 TBSP sake
2 tsp. mirin
2 tsp. shoyu
Carrot, grated or peeled into thin slices
Enoki mushrooms, cut into short lengths
Kiriboshi daikon (dried, shredded daikon, written as 切り干し大根)
12 ready made tofu pouches

  • If you've got time, put the water and konbu in the rice cooker to soak ahead of time.
  • Add the rice, seasonings and vegetables and press start.
  • When the rice cooker says you're done, taste the rice. Adding other ingredients can confuse even the smartest rice cooker. You may need more time, more liquid or both.
  • Rinse the tofu pouches in hot water, gently squeeze them dry and fill with rice mixture (I used a spoon for this, pressing down with the back to pack the rice into the corners).
  • Sprinkle with sesame seeds and enjoy!

(I filled my sushi up to the top because it looks pretty, but if you want yours to look more like this just fill them about two thirds of the way, close the pouch and arrange flap side down.)

I found conflicting advice about heating and rinsing the tofu pouches. Some advised boiling the sealed package to keep in the flavoring liquid, others rinsing and squeezing the tofu as you would aburaage. For the sake of science, I tried it both ways and the rinse and squeeze is a) far easier to handle, b) retains the flavor just fine, c) tastes and feels a lot more like every other inari sushi I've had in Japan. You could probably skip the rinse, but definitely squeeze well.

Inari sushi pouches generally come pre-seasoned in a sweetish stock. If you're using plain aburaage, you may want to try one of these, stock recipes.

What I love about inari sushi is the way it fits perfectly into my bento box (a bento design feature, I wonder?) and neatly into my mouth. Even when I work up my nerve for maki sushi, I'm pretty sure I'll spill it all over me.

Wednesday 9 May 2007

Campfire Food

Nagatoro River - Saitama


It's Wednesday, and I think I'm just about recovered from Golden Week. For those of you not in Japan, Golden Week combines the goodness of not one, not two, but THREE public holidays into the one week, prompting many people to take the remaining 2 days off and make a party out of it.

I had to come into work for a few classes, but I still managed to get out of town for a little rest and relaxation with some friends. It was my first time camping in Japan and I was surprised (and delighted) to discover the shower block you need thongs for had been replaced with indoor and outdoor onsen.

It was also surprising how much preparation had gone into these mini-breaks. Back home, most campers will grab some take away from the local fish and chip shop or use the provided BBQs to grill up sausages and steaks. At most, you'll bring a fry pan or hotplate and build a campfire to cook your meat. Here the sinks and prep areas had long waiting lines and many of the campers brought their own BBQs. When you consider than many of them were only staying one night, that's a pretty good effort.

We cooked our rice in kidney shaped metal canisters called hango (はんごう), which reminded me a little of the Australian billy, and gave that delicious crispy rice bottom that you miss out on with a rice cooker.

Hango - for cooking rice on a campfire.


There was also mountains of yakiniku and grilled vegetables, curry, yakisoba, gyoza, bread rolls and salad for breakfast. I don't think I'll ever get used to salad for breakfast, but everything was delicious and we ate and ate well into the night - Yoshi was still going back for curry seconds at 12 o'clock.

Since then I've been busy getting sunburnt, seeing giant kites and putting together lesson plans. I do have some more kitchen adventures to talk about though, so look back later this week.